Saturday, May 26, 2012

Garmin - add this feature to this screen please! Finish it!

One of the things I've learned after years of using Garmin GPS devices is that the GPS can be trusted 95% of the time.  But that last 5% of the time - watch out!  Therefore, I always take a quick glance at Garmin's selected route to make sure it makes sense to me.  Garmin makes this fairly easy.

1) After a route is calculated, press the horizontal green bar at the very top center of the screen.
2) An route overview list is shown.
3) Click on the menu icon in the upper left of the screen.
4) Click on the word MAP.

Here you will see an overview map of the calculated route.


One of my continued critiques of Garmin is that their devices never seem to be completely done in terms of functionality.  They never seal the deal.  As the industry leader who still tries to push devices at the $399 price point, I expect the devices to be done.  Here is a perfect example of being almost-done.

So, here we are shown a nice route overview map.  It is relatively easily accessible in 3 clicks from the main navigation screen.  Some Garmin devices, this being one of them, includes the ability to be shown multiple routes to your destination.  That is a nice feature.  But in typical almost-done style, Garmin doesn't connect the dots.  What if I don't like the chosen route above?

It would make perfect sense to invoke the multiple route selection feature from this screen. With a simple menu icon in the upper left corner of this screen, we could be provided with a multiple route selection screen complete with ETA, miles and traffic delay on each of the chosen routes.  Select one and go!

In fact, no where on a Garmin GPS, once you are navigating a route, can you ever initiate an overview screen of route choices to your destination.  Take the example above.  There are three perfectly good options to get from Des Moines to Dubuque.  There are all within 10 miles and 15 minutes of each other on this 3.5 hour trip.    But once you commit to a route, there becomes multiple ways to traverse a portion of your route after that.  Let's say that I commit to the route above.  Once I am near Cedar Rapids on I-80, there becomes three legitimate ways to get from there to Dubuque.  As I approach Cedar Rapids, I'd love to regenerate route options quickly to select my preferred route for the remainder of the trip.

The multiple route option feature can only be selected on the initial activation of a route. So to be presented with those options again, you essentially have to select your destination again and start over.  Hint: if you select your destination from the History list you can do this quicker.

From the screen above it is 9 button clicks in order to see route options other than the route shown on the screen.  It could be done in 2 mouse clicks from the screen above if implemented correctly.

Garmin: have the courage to go all the way with your devices.  Finish it.


Use your smartphone calendar as a GPS trip planning tool!

You wouldn't initially think about using your smartphone calendar as a GPS trip planning tool.  One of the drawbacks of Google Navigation, or any of the other navigation apps, is that they lack a planning tool.   A trip planning tool is convenient when you are taking a trip that has multiple stops.  Various 3rd party apps have been developed to attempt to fill this gap.  But no one needs a 3rd party app to do this. Even more powerful is combining your smartphone calendar with your Smartphone Link compatible Nuvi to achieve some great functionality.

When we take our motorhome across the US it is not unusual to have a route that might contain 4, 5 or more stopovers including preferred truck stops, overnight campgrounds, or along-the-way sightseeing opportunities.  Some of these stops can be somewhat tricky to find, especially remote campgrounds.  Once we arrive at our destination, some of our sightseeing locations can be remote and difficult to find as well.  While the motorhome gives us freedom, it also allows us to travel to remote areas that can't be navigated to with a standard street address.  Trip planning to a series of stopovers with very defined street addresses may not warrant using this method.  Users may find it easier to simply write the addresses on an index card and use the voice recognition features of your GPS to input them along your route.  However, this method is most useful when your locations can only be described using latitude / longitude.  Another example of this is when you want to take a specific route to a destination that you know the GPS won't calculate using the automatic method.  The easiest way to do this is to find the latitude / longitude of the center drive lane of the road of interest and enter that latitude / longitude as a stopover point in your route.

If you are fortunate enough to have an Android smartphone, a Garmin GPS and Garmin Smartphone Link, I will show you how to use your smartphone's calendar as the ultimate trip planning tool that is especially useful for navigating to even the most remote places in the US.  

This method leverages a little known fact about Google Maps for Mobile.  It allows you to pass a latitude / longitude to it from 3rd party apps (like the Calendar app).  The format is as follows:

loc:latitude,-longitude

There can be no spaces within that syntax. It all runs together, including the comma and the "-" ahead of the longitude.  In one of my first posts about Garmin Smartphone Link I went into great detail about how you can use the Location field of the smartphone calendar to pass street addresses from your calendar appointments to your Garmin GPS. This technique builds on this wonderful capability and leverages the loc: syntax noted above.

At this point, some of you may be thinking I am crazy.  After all, any Garmin GPS that can use Smartphone Link also has a built-in trip planning tool.  True, however, in my experience at least, I have found that Garmin has a horrible track record of preserving the functionality of your trip plan across map updates.  So if I am going to spend the time building a trip plan, I am going to build it in something that is fully under my control.

Let's pretend that we want to visit the Grand Canyon.  I've read an article about a great scenic view from a place called Toroweap Overlook. Google Earth is a fantastic tool for finding places like this.  Here is a view of the location of Toroweap Overlook from Google Earth. The actual location of the lookout is where the small photo icon is located.  You can see the road on Google Earth.

Google Earth location of desired destination

A great feature of Google Earth is that wherever you hover your mouse, the latitude and longitude is shown at the bottom of the screen.  As you zoom in closer you can get down to a very close level of detail, in this case to what appears to be a turn out along the road.  Hover your mouse there and then write down the latitude and longitude. I continue using Google Earth until my entire trip stopovers and all of my sightseeing destinations are found and I've recorded the latitude and longitude.  I prefer to put my entire trip in my calendar so I will also keep a list of destinations that include good street addresses as well.

From here, I move to my calendar.  You can perform this step in multiple ways depending on the calendar you use on your phone.  You can enter it directly into your phone's calendar, enter it in Outlook if you use Exchange sync or enter it on the web in Google Calendar.  I will enter these directly into my Android device's calendar in this example.

After I've collected all of my trip data from Google Earth, I now enter it into my calendar.  Using the calendar has the added advantage of being able to invite friends and family to the appointment, entering the travel itinerary in a way that is time-appropriate, having your work's free/busy functionality be accurate for your trip, etc.

Here is what this appointment looks like in my Android calendar, by putting the loc: syntax discussed above in the Location field of the calendar appointment:

Android calendar appointment for travel destination

All of the steps discussed above would be performed as a pre-trip, planning activity.  Your calendar should be populated with all of the individual locations that you need on your trip on the days and times you plan to travel to them.  Once your calendar contains all of your locations, you can head out on your trip.

Now we will discuss what happens on your trip.  You should read this post first in order to better understand the capabilities of Garmin Smartphone Link.

When you head to your first destination, open your smartphone's calendar appointment and click on the loc: syntax in the Location field.  It should be underlined.  This will open Google Maps automatically and zoom into your desired location.  You can visually confirm from Google Maps that the location is the same as what you manually found in Google Earth.

Google Maps for Mobile location of latitude / longitude of destination

Now, as outlined in my previous post, click on the latitude and longitude shown above in Google Maps.  Click on the word "Direction" on the next screen.  Then click on the blue navigation triangle at the bottom left of the next screen. Select "Smartphone Link" as the fulfillment action.  This will pass your location to your Garmin GPS.

Here is the result of this location being passed to my Garmin Nuvi 3590LMT.  Notice that the Garmin doesn't include this road, rather the closest known road is the north/south road to the west where the backwards "C" curve is located.  This perfectly illustrates that it would be impossible to find and navigate to this specific location without the use of a tool like Google Earth as there is no viable street address.


As your travel day or vacation week continues, you simply return to your smartphone calendar for each stop and repeat this procedure.  The actual procedure of clicking on the link in the calendar and transferring it to your GPS through Smartphone Link takes about 5 - 10 seconds. Arguably you can't enter a street address manually into your GPS in this amount of time.  Even better, your co-traveling companion could do this for you while you drive.

Enjoy this great method of traveling planning.  Follow me on Twitter for more.

Friday, April 20, 2012

Garmin Trip Planner App & ETA's - Disconnected?

Sometimes the choices that manufacturers make in products just leave me shaking my head. For many of these things I can except the fact that I am not the target customer. I am a power user, but most products are made with the casual user in mind.  This particular issue though leaves me shaking my head when I consider the viewpoint of any user of the product.

The Garmin 3590 is their flagship consumer product. It includes an app called trip planner. Trip planner is a great feature that allows you to build a trip in advance including multiple stopovers and route waypoints.  A great option within trip planner is the ability to define a stopped duration time at any of the defined waypoints.

On Wednesday, I had a need to drive from Des Moines Iowa to Chicago Illinois and back in the same day with only a short 30 minutes stop in Chicago for some quick business.  I know, it's insane, but some things just have to be done.  There were two very important ETA's in this route. My ETA in Chicago was very very important. In addition I had to be home at a specific time in order to participate in one of my daughters activities.  I knew exactly where I would stop for gas and exactly where I would stop for lunch. I built this route within the trip planner app and included the gas station stops as well as lunch and provided stopover times at each of these waypoints. Imagine my surprise when I activated this route and found that Garmin takes none of this stop over time into account into the ETA they present. They do take the additional driving time to get to the waypoint but they do not take the stop time into account. Absolutely insane.

If I build a waypoint into a route for a gas station, the route planner allows me to tell it that my stop time will be say, 20 minutes. If I am building a cross-country route that I will take in our RV, and I have three gas stops along the way, that is an hour of time that I will be stopped on my route.  Using this feature, it allows me to get a more accurate picture of my route that day due to my stops.

So I am taking the time to build this route and I'm spoon feeding Garmin's routing algorithm the fact that the route will take one hour longer than it should, yet Garmin completely ignores this information.

I would love to hear the explanation for this one.

Wednesday, March 28, 2012

Garmin Nuvi 34xx/35xx updates firmware & Smartphone Link - Traffic Problems Solved?

Today Garmin released firmware v6.2 for the Nuvi 34xx and 35xx devices, as well as a Smartphone Link for Android app update.  The release notes make reference to several Smartphone Link and Traffic improvements that insinuate that perhaps we finally have a fix for an apparent problem that I outlined several months ago in this post and this post.  I won't restate those posts other than to say that the problem was an apparent incompatibility when using both Smartphone Link Live Traffic and the GTM-60 HD traffic receiver.

After updating my Nuvi 3590LMT to v6.2 and upgrading my Smartphone Link for Android app, I set out to determine whether the problems have been solved.  Tonight I report that I think that most of the issues are resolved.  I say that I think they are resolved because there is one little nuance that I observed that I am not entirely sure how to interpret.  In addition there remains one issue that appears to still be unresolved.  Here we go...

I began this test with Smartphone Link connected and the Nuvi connected to a non-traffic-receiver DC power source.  As expected, traffic was received without issue through Smartphone Link.

Smartphone Link connected, GTM-60 disconnected.

I then turned off my smartphone's bluetooth service and turned off the Nuvi.  I turned the Nuvi back on with the non-traffic-receiver DC power source to ensure that all knowledge of any traffic detail was gone.  I confirmed this by attempting to go to the traffic screen.  I was shown this screen:

Bluetooth off / Smartphone Link disconnected / GTM-60 disconnected
Next, I connected the GTM-60 while bluetooth was still turned off (thus Smartphone Link disconnected).  The Nuvi began to acquire traffic from the GTM-60 as shown in the following screen:

Bluetooth off / Smartphone Link disconnected / Obtaining traffic signal from the GTM-60
Once the GTM-60 successfully connected to the traffic service, I obtained traffic content.  Bluetooth and Smartphone Link are still disconnected.  You can be assured that the traffic being received comes from the GTM-60 because of the green signal strength bars at the top of the screen below.  These are not present when using Smartphone Link as your traffic source.

Bluetooth off / Smartphone Link disconnected / GTM-60 connected
So far, everything works as expected.  But it worked like this up to this point two months ago too.  Now is the step that will test if anything has been fixed from two months ago.  With the GTM-60 connected, I will now enable bluetooth and connect Smartphone Link.

Smartphone Link connected / GTM-60 connected
Yeah!  Unlike what happened two months ago, I received a Traffic Up To Date message from Smartphone Link while the GTM-60 is connected.  The traffic incident shown above was short lived and within a couple seconds of seeing this screen, the screen changed to this:

Smartphone Link connected / GTM-60 connected
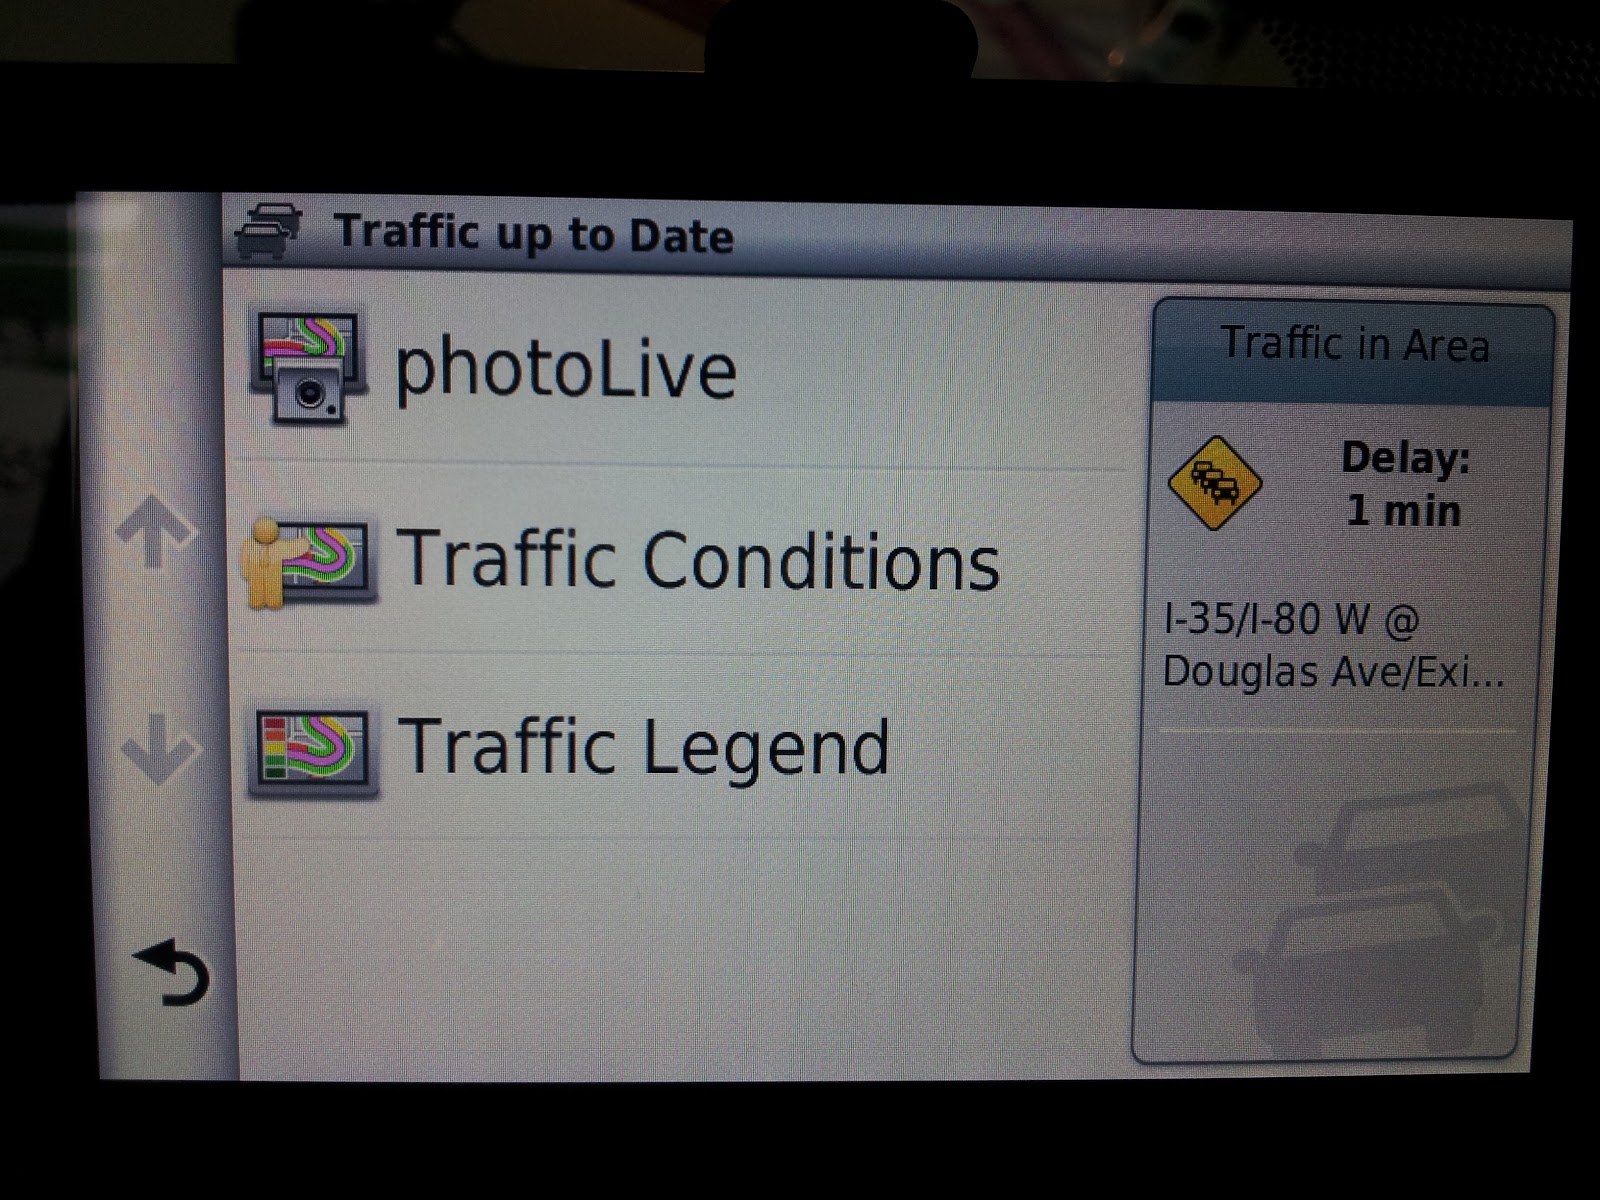
This is still a positive sign.  The GTM-60 is connected. Smartphone Link is connected.  I am seeing messages that reinforce that this is working as it should.  It is reporting Traffic Up To Date and No Traffic In Area.  This reinforces that a signal is being received from Smartphone Link and the content of that traffic signal is no traffic content.  However, while observing this screen I find that this screen only lasts a matter of seconds.  The screen then switches to the screen below for a significant amount of time (several minutes).  The switching from the screen above to the screen below is what makes me unsure that this is working exactly as I'd expect it to be.

Smartphone Link connected / GTM-60 connected
This screen is what makes me unsure about whether this is really fixed or not.  This screen is only seen when BOTH Smartphone Link and the GTM-60 are connected.  You never see this screen when using only Smartphone Link or only the GTM-60.  Garmin needs to be consistent about the messages it presents to the user so that confidence is instilled in the user that the service is working as it should be.

I must presume how this should be working because Garmin doesn't document the specifics.  I presume that there are two aspects of receiving traffic data on this unit.  First, you must have a data connection to the traffic server.  Garmin has provided us two ways to make this data connection, either using HD Radio through the GTM-60, or using bluetooth through Smartphone Link.  Once this data connection is made to the traffic server, then we obtain traffic CONTENT from it.

When only the GTM-60 is used, Garmin nicely presents the status of the traffic CONNECTION by showing the green signal strength bars at the top of the screen.  However, when the Smartphone Link app is used, there is NO confirmation provided to the user that there is a traffic CONNECTION being made.  All we know is that there is a bluetooth connection to our phone.  That is not the equivalent of the green signal strength bars when the GTM-60 is used.  Bluetooth can be connected without there being a connection to the traffic server.

Therefore, when Garmin shows the message above "Waiting for Traffic Data" it leads the user to say "Why?"  Why are you waiting for the traffic data?  Do you not have communication with the traffic server? Or is this simply the dormant period while the Nuvi waits 2 minutes (or whatever the time is) before it checks for the next traffic message and everything is operating as expected?  There is no way for the user to know this.

One thing left unresolved is the intelligent switching between Smartphone Link and the GTM-60 for users on a 3G CDMA network (Verizon, Sprint and others).  On a 3G CDMA network there is no data connection while on a voice call.  But when in a voice call, the Nuvi screen shown above never changes.  This perpetuates the confusion.  When on a phone call on a 3G CDMA network there is no way that the Nuvi will receive traffic data but it continues to say "Waiting for Traffic Data."  There is no data connection available on the smartphone.  The Nuvi should be intelligent enough to detect the loss of connection to the traffic server from the smartphone and switch to the GTM-60.  Instead, the Nuvi sits there "Waiting for Traffic Data" when there is no chance of receiving it until the phone call is over.

This perpetuates the confusion of the "Waiting for Traffic Data" message when not on a call.  Since it has been shown that this message is displayed while on a phone call when there is no possibility that it could be connected to the traffic server, it gives me no confidence as to whether I am actively connected to the traffic server or not.

The user should be shown the connection status to the traffic server, the signal strength of that connection (GTM-60 only) and the content of the traffic message.  Those three pieces of information permit users to know what is happening with their traffic service at all times.

One other annoyance remains not addressed in this update.  This issue involves Garmin's use of the green traffic icon on the main map display.  Consider the following example:  you are driving on the freeway between two major cities.  You are using the GTM-60 traffic receiver.  As you travel between major cities, somewhere in the middle you will be well beyond the reception range of the GTM-60.  You are therefore not receiving any traffic content at all.  However, because the GTM-60 is simply physically connected to the Nuvi, Garmin displays a green traffic icon on the map.  This is inaccurate.  A green traffic icon indicates that traffic is clear.  The Nuvi doesn't know this however, because it doesn't have a traffic signal at all.  The icon should be a gray or similar color to indicate a lack of a traffic signal.  Visually, Garmin should not be presenting "No Traffic in Area" the exact same way as not having a traffic signal at all.  It is inaccurate and misleading.

Bottom line - it appears that the traffic problems when using both Smartphone Link and the GTM-60 are resolved.  However, there is much work that could be done to improve the presentation of this information to the user.  And there is an unresolved problem for 3G CDMA users that still needs to be addressed.  The majority of CDMA users will not be using 4G (which does allow simultaneous voice & data) until well after the 34xx and 35xx series devices will likely be discontinued.  Garmin should fix this 3G CDMA oversight.


Garmin adds Tracker feature to Smartphone Link - Beware surprise privacy issues!

Today, Garmin released an update to Smartphone Link which added an exciting feature called Tracker.  Think of tracker as Garmin's version of Google Latitude.  This feature requires an update to Smartphone Link in the Android Play Market as well as an upgrade to Nuvi firmware v6.2.

The Tracker functionality allows you to use your smartphone to keep track of other Garmin Tracker user's location.  However, the Tracker feature also lets you post messages and location information to both Facebook and Twitter.  Interestingly, Garmin's implementation of this feature seems to require both the Facebook and Twitter apps to be on your phone.  You enable this feature from within the Smartphone Link app, not on your Nuvi.  It appears to derive your login information for these services from the Facebook and Twitter apps themselves rather than having you enter them into the Smartphone Link app.  When selecting the social network services you wish to use, appropriate permissions are requested and confirmed within the Smartphone Link app.

You can enable a "follow me" functionality that can be time limited.  This feature allows you to select other Tracker users, as well as Facebook and Twitter posts, to be the recipient of periodic "check-ins" of your location.  I have not yet experimented with how often the follow me check-ins occur.

There is also a manually initiated feature that allows you to "send" your current location to other Tracker users, to Facebook and to Twitter.  You can select or deselect any of those services as you choose.  Garmin has provided canned messages such as "running late" or "stuck in traffic" that can be selected.  In a nice touch, Garmin has also populated the canned messages with messages that are "location aware."  In other words, my current location city was populated as a select-able canned message.  Also available was a message that said "it is 72 degrees here" obviously pulling that information from the Smartphone Link Advanced Weather feature. Job well done on this Garmin.

I selected a canned message that said "In Des Moines, IA" and posted it to Twitter and Facebook.  The Nuvi presents a confirmation screen that the message was posted.  Upon reviewing the resulting post on both Facebook and Twitter, I was pleased with the presentation, but also very concerned about the privacy implications of what I found.

On Facebook my message "In Des Moines, IA" was posted with the expected footer message indicating that it was posted by Garmin Tracker.  But there was also a clickable image of a website in the post! On Twitter, it also said "In Des Moines, IA" but also contained a clickable URL!

When clicking either the Facebook or Twitter link, I was brought to this webpage:


I was very surprised to find the amount of detail being revealed that I found on this website.  At the top of the page (not shown here) was my name, exactly how I'd entered it into the Garmin Tracker app.  But more disturbing was the availability of data that included an exact street address, latitude / longitude, and speed I was traveling.  There was also a map that included zoom controls that provides viewers with house-level precision of my location!

Perhaps I am too used to Google Latitude and its privacy controls, but I did not expect Garmin Tracker to reveal this level of detail about my location.  I very often use social media to inform friends of my location, but in a very general sense.  I might post that I've arrived "In Chicago, IL" or "Landed at LAX."  But seldom do I want anyone but my immediate family to know my precise location to the level shown above.

The level of detail revealed by Garmin Tracker might be fine for my wife to know.  But I probably don't want my Facebook friends to know that level of detail.  And, for sure, I don't want my Twitter followers, who I might not even know, to know this level of detail.

Tying a location notification feature to your Garmin Nuvi  makes perfect sense and it is well implemented by Garmin with this new Tracker feature.  However, it badly needs user controls for the granularity of information shared, like Google Latitude currently offers.  There are obvious reasons why, for the same location notification post, that I'd like my wife's Garmin Tracker ID to know my precise location, but my Facebook friends and Twitter followers to know only the town I am in.  I can think of no case where revealing my speed is necessary or important.

Garmin has some work to do on disclosing and tightening up this privacy issue, but Tracker is a great start to a useful feature.